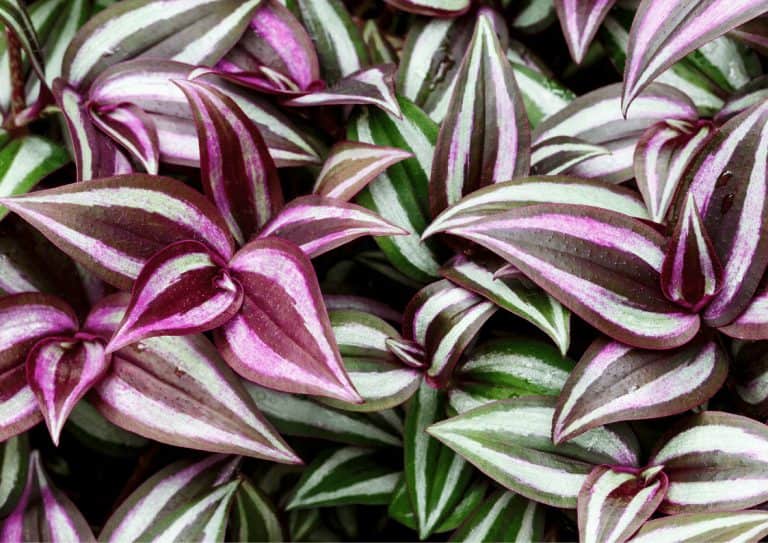
Can Wandering Jew Live In Water Forever? (Soil Free)
- Lakeisha Ethans
- September 18, 2022
If you buy something using the retail links in our articles, sometimes we earn a small affiliate commission. This does not impact the products we recommend.
Easily propagated via cuttings, Wandering Jew has been a popular houseplant for many years. Its appeal is boosted by the fact that it is robust in the face of neglect and notoriously difficult to kill.
Cuttings of Wandering Jew, more commonly known by its Scientific name Tradescantia, can root in virtually any medium, allowing them to be propagated in both soil and water.
But can a fast growing plant such as this survive in water permanently, or does it eventually have to be potted up in soil?
Wandering Jew cuttings will form a root network and survive in water as long as essential nutrients such as nitrogen, phosphorus and potassium continue to be provided by means of a liquid fertilizer.
When provided with nutrients Wandering Jew can survive in water forever however it is a sub-optimal growing environment and will subject the plant to increased risk of fungal infections and restrict the size and strength of its stems.
As such, knowing when and how to transfer water propagated Tradescantia cuttings into soil is an important skill to have – and that’s what we’ll cover below.

When should I transfer Wandering Jew cuttings from water to soil?
After about one or two weeks in water, you’ll notice the first roots beginning to form on your Wandering Jew cutting.
These roots will initially be quite thin and fragile and are not yet capable of entirely supporting new plant growth.
Once roots have reached one or two inches in length and have bulked up and strengthened into a reliable root network, it’s time to transfer your Wandering Jew from water to soil. This will typically happen at around the 1-2 month mark, but this timeline may vary depending on specific growing conditions and environmental factors.
If you want to leave your Wandering Jew in water for longer, that’s fine but be aware that this is risky, as the plant won’t have easy access to the minerals and nutrients that potting mix naturally provides.
To compensate, you’ll need to add small amounts of liquid fertilizer to the water in order to support the plant’s growth.
When transferring from water to soil there also exists a risk that a proportion of the roots will dry and wither.
Wait until the root network is dense enough so that even if 50% of the water roots should die off the plant will still have sufficient means to intake water and nutrients.
How should I transfer Wandering Jew cuttings from water to soil?
- To start, select a suitable pot and substrate with good drainage. A peat-free potting mix should be fine.
- Fill your pot to just beneath its rim. Create a void in the soil using a pencil or your finger as deep as is needed to entirely bury the water roots. Pre-establishing this space rather than pressing the roots through soil will prevent them from being damaged.
- Most people choose to transfer several cuttings into the same pot at once to create the appearance of a nice, thick, and bushy plant.
- Keep the cutting in the same conditions with bright, indirect light exposure that does cause the plant to risk a great deal of water loss. Soil should also be kept moist but not sodden.
When the Wandering Jew plant starts to produce new foliage you’re in the clear, and you’ll know your flora has taken root successfully.
Transferring Wandering Jew cuttings from water to soil can be a delicate process, as the water roots can be fragile. Be very careful as you remove them from their containers and as they are buried in soil. Tuck cuttings neatly against the pot edge to encourage the roots to grow down as well as outwards then thoroughly water the plant to remove air bubbles surrounding the roots.
Round up
The Wandering Jew plant is easy to propagate in water, but ideally it shouldn’t live there forever. Leaving it in water for too long will cause it to develop nutritional deficiencies and eventually, wilt.
A houseplant feed solution can be added to the water to meet the plant’s nutritional needs however this won’t provide the sustenance that the plant has evolved to receive.
Once a healthy cutting has developed a stable root network in water, it should be transplanted into soil as soon as possible.
The process of transferring a Wandering Jew to soil from water may be tricky, as the roots are fragile.
As long as you’re careful and ensure that the soil is pre-moistened evenly and drains well, your cutting will easily take to its new environment when given proper care.
Throughout all young growth stages, Wandering Jews do best with bright, indirect sunlight and should have access to evenly distributed moisture.
FAQ
The best time to start the propagation process is in spring or summer, which are the Wandering Jew’s natural growth seasons. During these periods, as a houseplant they’ll root the quickest, however it is possible to propagate this plant at any point during the year when indoors.
To propagate Wandering Jew cuttings, you must first make a healthy cutting. You can do this by seeking out healthy, well-grown stems of any Wandering Jew plant. Then, use a sterile and sharp blade and cut the stem at a 45-degree angle.
The plant’s stems are quite brittle, so they’re not hard to cut, and you should snip it right beneath a leaf node.
Leaf nodes are small bumps on the stem of a plant. It’s from here that new leaves will start to grow. Cuttings should measure between 4-6”, and you may want to make a cutting that contains between two and four leaves above the cut node.
Remove the lower set of Wandering Jew leaves from the stem cutting so that no leaves will be submerged. Then, get a clean vase, jar, test tube, or glass and fill it with ideally non-chlorinated water (although plants will still root in chlorinated tap water).
It is important that the bottom leaf node of the cutting is fully submerged and remains that way throughout the growing process. The remaining, uncut upper leaves, meanwhile, should not be submerged.
It’s recommended that you use bottles that have a small lip. This allows you to keep the cutting’s upper leaves above water, so only the stem slips into the bottle. Any leaves that are left submerged will end up rotting, which can harm your plant in the long run.
Finally, place your bottle with the cutting in a location with bright, indirect sunlight, such as a window with a good amount of daily sun. However, you should ensure that the cutting is not exposed to afternoon sun, as this will likely be too hot and can scorch it.
You’ll now need to check on the growing cuttings regularly. You should top up the water every few days so your cutting also has adequate hydration. If the water becomes milky, change the water and replace it with a fresh batch to keep the cutting healthy.

Lakeisha Ethans
Houseplant Writer
Mother to two humans and hundreds of plant babies. Lakeisha uses her 15 years of experience as a content writer to specialise in simplifying what you need to know to grow and care for all indoor plants.
Similar Posts
Can I Use Cactus Soil To Pot My Monstera?
Does Cacti soil have the same properties as Monstera soil? And can you use the same potting mixture across both plant families? The answer is here..
The Best Soil Mix For Philodendron Xanadu (Soil Recipe)
The perfect soil mix for Philodendron xanadu provides water retention, aeration and nutrition. We explore what ingredients provides these qualities best.


